The Snowflake Method of Outlining Your Plot
Coming up with a plot for your novel is no easy task. But worry not; we break down a step-by-step method that will help you outline your story!

When it comes to writing a novel, one might say that planning is the most important step of all. A poorly constructed and inconsistent plot outline will, eventually, lead to more problems along the writing process and in the first draft.
This is why the Snowflake Method, coined by Randy Ingermanson, is so handy for writers. It's an easy to follow, step-by-step method for outlining a novel — and a saving grace for writers struggling to get started on planning.
So, if you're staring at a blank document and unsure of how to start, why not give this method a try?
What is the Snowflake Method?

Photo by Zdeněk Macháček on Unsplash
"I claim that's how you design a novel — you start small, then build stuff up until it becomes a story" — Randy Ingermanson
Source: The Snowflake Method For Designing A Novel by Randy Ingermanson
Randy Ingermanson, who was once a software architect, coined this methodology using the concept of the Koch Snowflake, a snowflake built from, in stages, a sequences of iterations. It first starts from a triangle, and this triangle is multiplied to eventually form the snowflake.
The plot outline is built similarly in the Snowflake method! You begin with a single sentence and, in a series of stages, build up to a four-page synopsis of your novel and fully fleshed out character sheets.
It may sound daunting, but we're here to break it down as best as we can, along with some examples to make it as easy to understand as possible.
How the Snowflake Method works
1. Write a one-sentence summary of your story
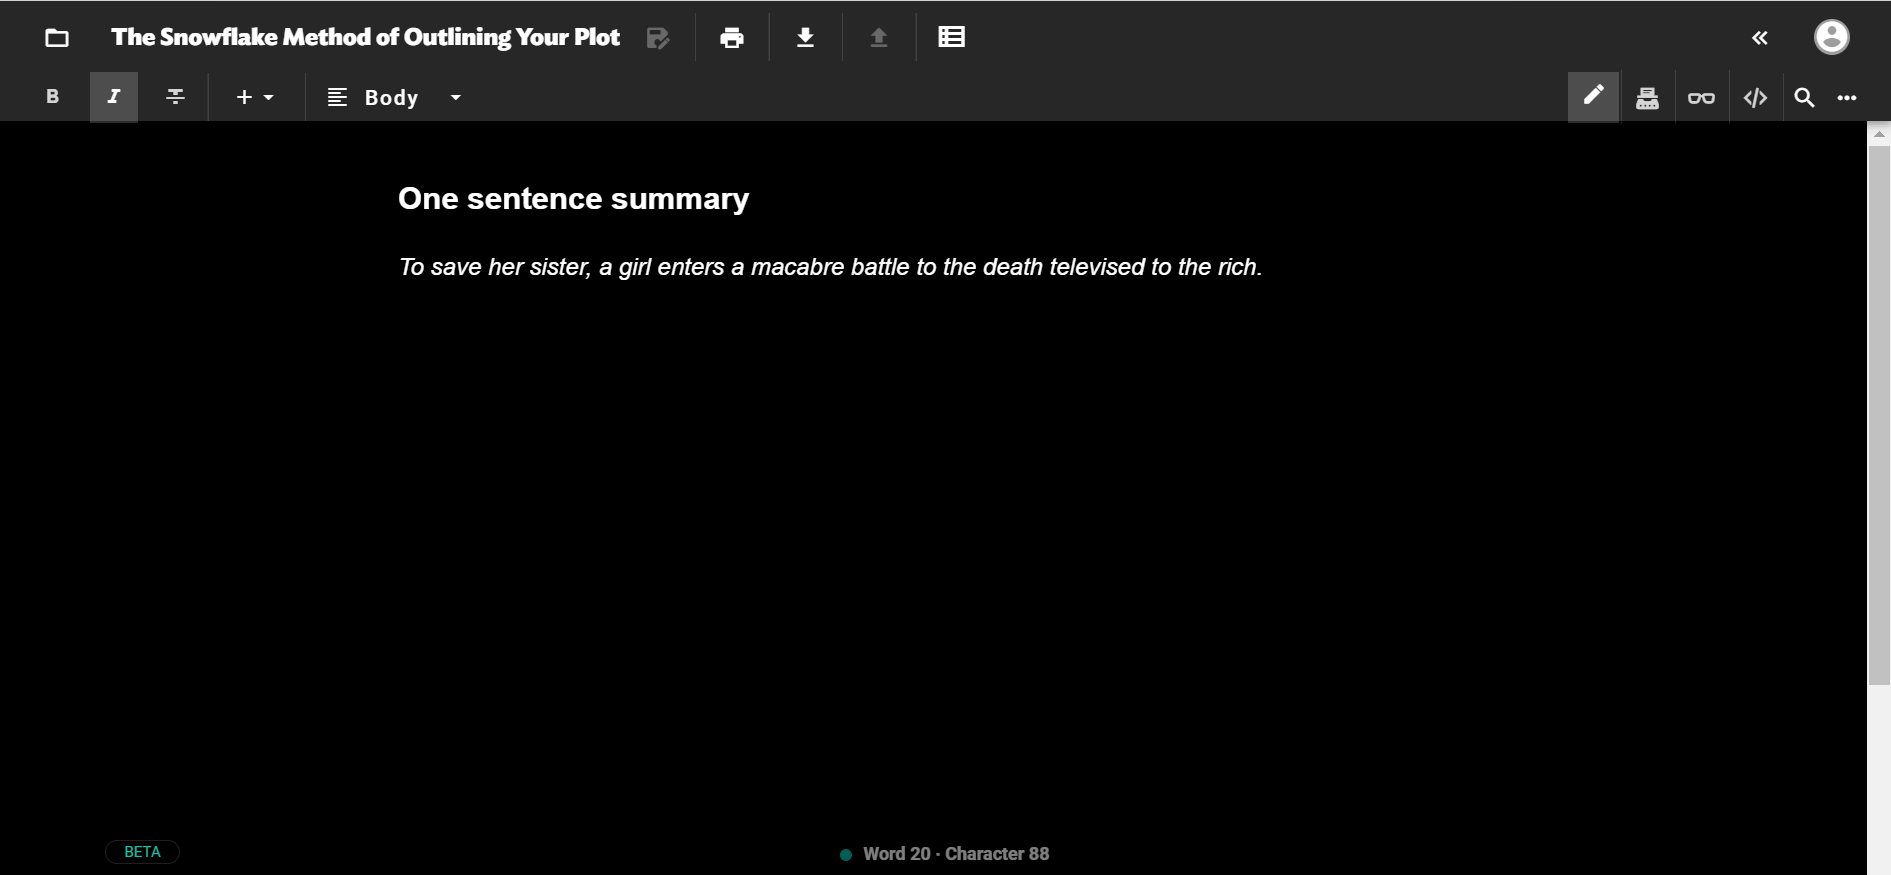
What it says on the tin. Ingermanson actually recommends that this step take less than an hour, include no character names, and be less than 15 words.
Here's how the plot of The Hunger Games by Suzanne Collins would look like as a one-sentence summary.

Aside from being a summary of your story, this sentence should also be the hook to your novel. To come up with a compelling one-sentence summary, you may want to take inspiration from blurbs of existing novels.
2. Expand the sentence into a paragraph
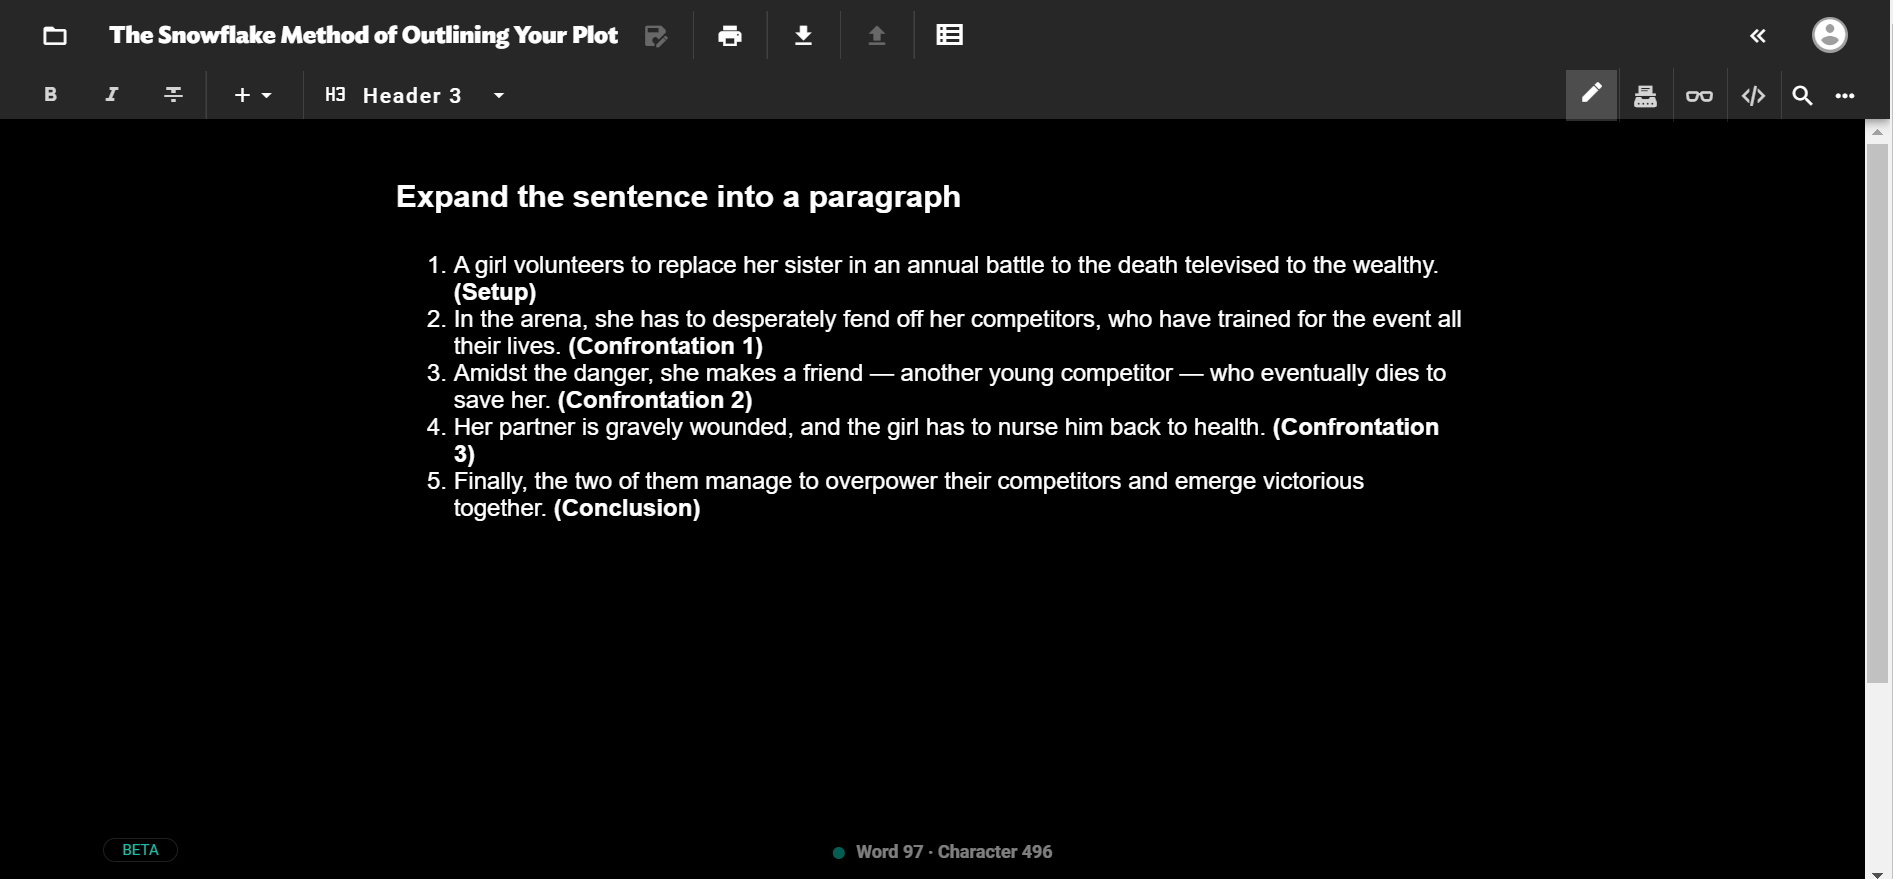
Onto the second stage. Now, you should add the details that make up your story. Ingermanson follows the three act structure in his methodology, which details that a story is made up of the following: The setup, the confrontation and the conclusion.
In all, this paragraph should be around 5 sentences long — the first for the story setup, the last for the conclusion, and the remaining 3 for each confrontation. That said, this structure varies according to the number of confrontations in your story. There's simply no hard and fast rule!
So, a paragraph-long story synopsis of The Hunger Games (broken down into acts) would look something like this.

3. Create a one-page summary of each main character
"Characters are the most important part of any novel, and the time you invest in designing them up front will pay off ten-fold when you start writing." - Ingermanson
Now that you have a decent overview of your story, it's time to do the same for its main drivers — the characters. Your main characters are perhaps one of the most important elements of any story, which means they need to be fleshed out thoroughly.
Ingermanson suggests answering the following guiding questions to form a detailed character sheet:
- The character's name
- A one-sentence summary of their storyline
- What is their motivation?
- What is their goal?
- What is their conflict? What is preventing them from reaching their goal?
- Their epiphany — what will they learn, and how will they change?
- A one-paragraph summary of their storyline
4. Expand the one-paragraph story synopsis into a page-long summary
The first three stages of the snowflake method will give you the skeleton of your plot. And now, you'll need to add details that make up the meat of things, and we'll start by expanding on your one-paragraph synopsis.
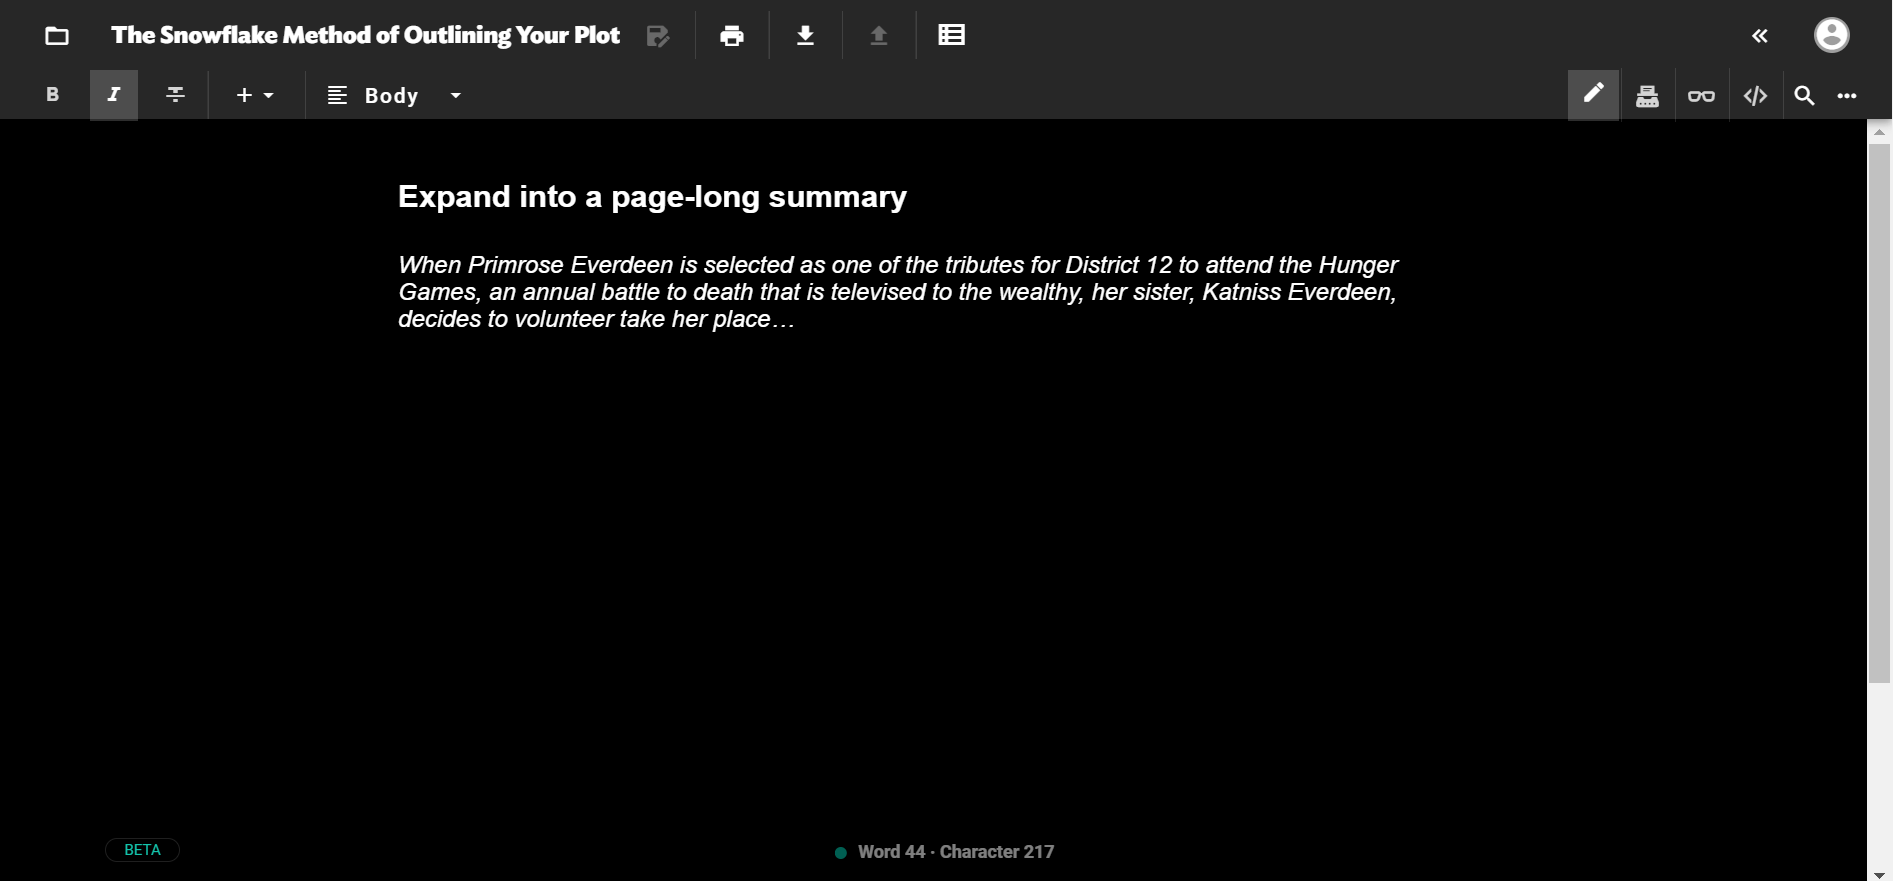
The key here is to expand each sentence into its own paragraph. Since each sentence encompasses a story act, you'll be detailing what happens in each "act". This will help you establish the foundation of your story in a single page.
Here's an example of how the setup to The Hunger Games may begin:

5. Write synopses from the POVs of each main character
Now that you have a better understanding of the main events of your story, it's time to go back to your characters. Ingermanson suggests that writers create up a one-page description of each main character, and half-page descriptions for any other important characters.
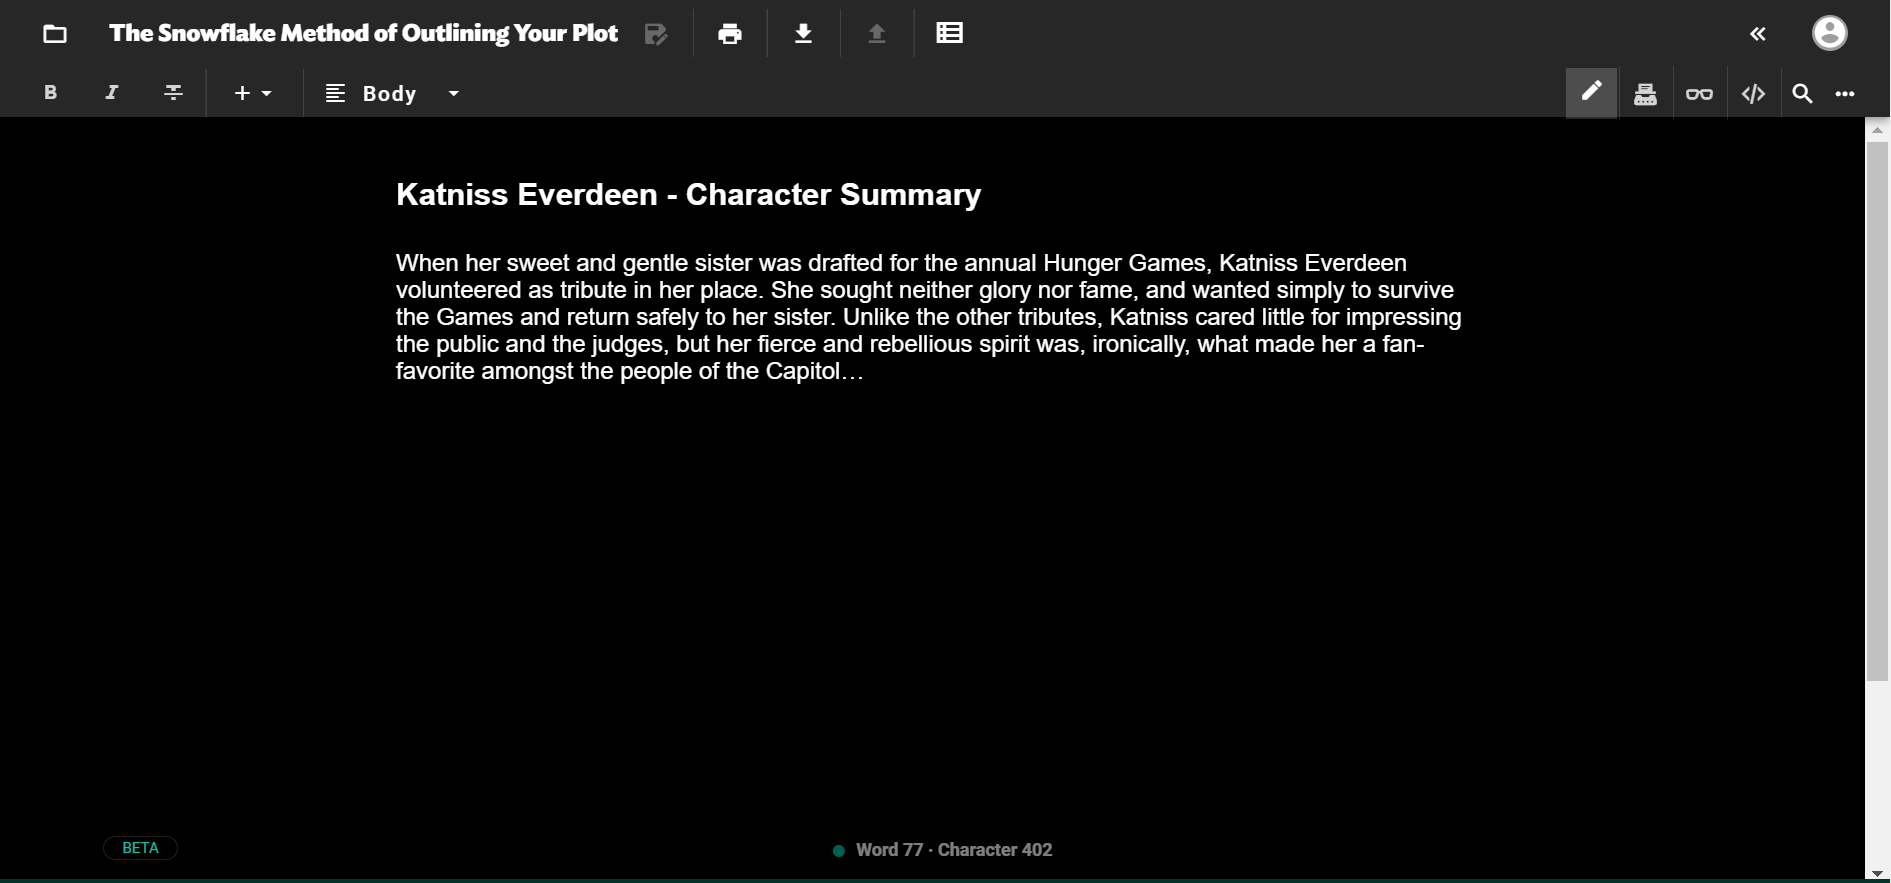
These character synopses should tell the overarching plot from their individual perspective. Not only does this help you better understand your character, but it also helps to iron out any contradictions or weaknesses in their motivation and character development.
Katniss' character synopsis, for example, might go something like this:

And so on and so forth.
6. Expand your story synopsis and create a scene-list
At this point, all your previous efforts should culminate into a rather well-thought out plot and several storylines for each character. Now, we ought to delve deeper into your story by expanding your one-page story summary into a 4-page synopsis.
Of course, this easier said than done, but the key is to expand each paragraph from step 4 into (ideally) a single page each. This is where you can really embellish your story with details as well as spot and address any plot holes.
From this detailed story synopsis, you can now break it down into a list of notable scenes. Many writers tend to have a specific scene that they desperately want to write, but aren't sure how to get there. This is where crafting a list of scenes can help you establish that organic and coherent flow in your story.
7. Create fully detailed character sheets
It's said that characters are a writer's children. You may have spent many days drawing up complex backstories and creating Pinterest mood boards, and you may even have taken a pencil to paper just to draw up a character design for them.
Well, it's time to put all those thoughts onto paper! In this stage of the Snowflake method, take around a week to draw up fully detailed character sheets. These sheets should explore just about every aspect of your characters, and more importantly, delve into their character development.
How do the events in the story change your character? Addressing this important question will take you on the first steps to creating a compelling character-driven story.
And if you're not sure where to begin, there are many character sheet templates available on the Internet. Just do a quick Google search, and you'll have a great variety at your fingertips.
At the end of the day, the Snowflake method is, ultimately, just a guide! It's entirely up to you to make changes to the method according to your tastes and preferences. And for those whose ideas arise spontaneously, consider using a digital writing app like JotterPad!
JotterPad's cloud sync feature allows you to create and edit your documents across multiple devices, so that you can add to your outline anytime, anywhere.

So regardless of whether you're utilizing the Snowflake method, we wish you a happy planning session!

